Scorecard
| Yrds | Par | SI | Yrds | Par | SI | Yrds | Par | SI | |
|---|---|---|---|---|---|---|---|---|---|
| 1 | 475 | 5 | 10 | 443 | 5 | 10 | 394 | 5 | 9 |
| 2 | 350 | 4 | 8 | 336 | 4 | 8 | 302 | 4 | 7 |
| 3 | 286 | 4 | 12 | 280 | 4 | 12 | 250 | 4 | 15 |
| 4 | 95 | 3 | 18 | 83 | 3 | 18 | 70 | 3 | 17 |
| 5 | 376 | 4 | 2 | 371 | 4 | 2 | 302 | 4 | 1 |
| 6 | 155 | 3 | 16 | 136 | 3 | 16 | 128 | 3 | 13 |
| 7 | 397 | 4 | 4 | 388 | 4 | 4 | 346 | 4 | 3 |
| 8 | 146 | 3 | 14 | 128 | 3 | 14 | 108 | 3 | 11 |
| 9 | 422 | 4 | 6 | 409 | 4 | 6 | 359 | 4 | 5 |
| OUT | 2702 | 34 | – | 2574 | 34 | – | 2259 | 34 | – |
| 10 | 195 | 3 | 11 | 195 | 3 | 11 | 170 | 3 | 16 |
| 11 | 383 | 4 | 1 | 363 | 4 | 1 | 323 | 4 | 6 |
| 12 | 269 | 4 | 15 | 261 | 4 | 15 | 237 | 4 | 12 |
| 13 | 336 | 4 | 13 | 329 | 4 | 13 | 298 | 4 | 8 |
| 14 | 517 | 5 | 3 | 505 | 5 | 3 | 398 | 5 | 2 |
| 15 | 133 | 3 | 17 | 126 | 3 | 17 | 109 | 3 | 18 |
| 16 | 230 | 3 | 5 | 222 | 3 | 5 | 195 | 3 | 14 |
| 17 | 325 | 4 | 7 | 321 | 4 | 7 | 320 | 4 | 4 |
| 18 | 514 | 5 | 9 | 486 | 5 | 9 | 409 | 5 | 10 |
| IN | 2902 | 35 | – | 2808 | 35 | – | 2459 | 35 | – |
| TOT | 5604 | 69 | – | 5382 | 69 | – | 4718 | 69 | – |
| SSS | – | 67 | – | – | 67 | – | – | 68 | – |
Hole Descriptions
Please click below to view a brief description of each hole.
Hole 1 Broadhurst

A nice, relatively short par 5 to start with. This hole plays a little longer than the yardage suggests due to its elevated green. The tee shot is important if you want to go for the green in two so beware of the tree in the middle of the fairway! Hit your shot to the green too long and you have a tricky chip on the downward sloping green with bunkers lurking below. For many. however, on the green in three gives a good chance of par.
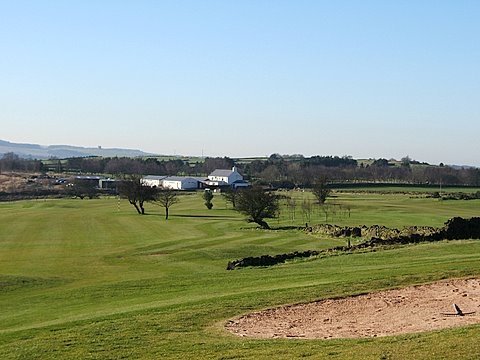
Hole 2 Eaves Knoll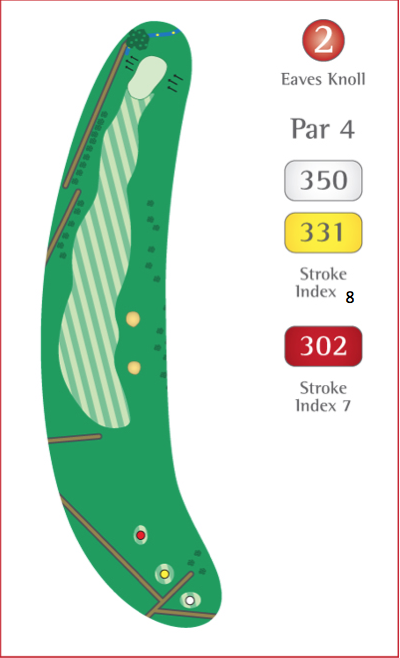
A nice par 4, which again plays its distance. The ideal tee shot would be on the left side of the fairway as it would open the green for the approach. However, over hit it and you may find yourself up against the wall on the left hand side. The two fairway bunkers on the right seem a magnet for many a drive so beware! Any approach shot pulled slightly left or long will be severely punished by running away to the wall or into the water hazard around the rear of the green.
Hole 3 Whitle
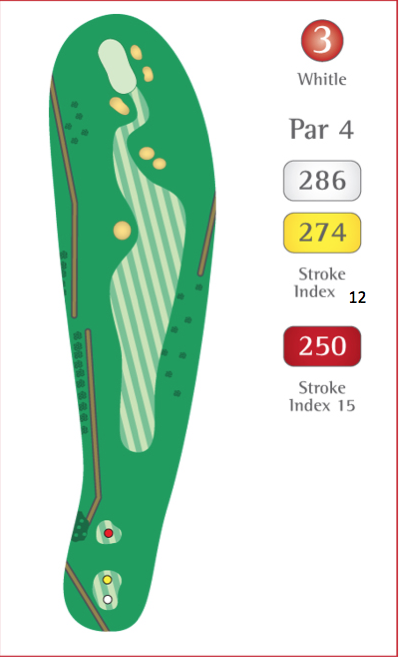
A short par 4 which has risks and rewards. The slim green is reachable for the bigger hitters but is well guarded by bunkers in front. So the safe shot could be to lay up just short of the fairway bunkers leaving your favourite distance to the long green. Everything runs to the right so beware of the two bunkers on the right of the green as well the trap in front of the green which swallows up anything short!
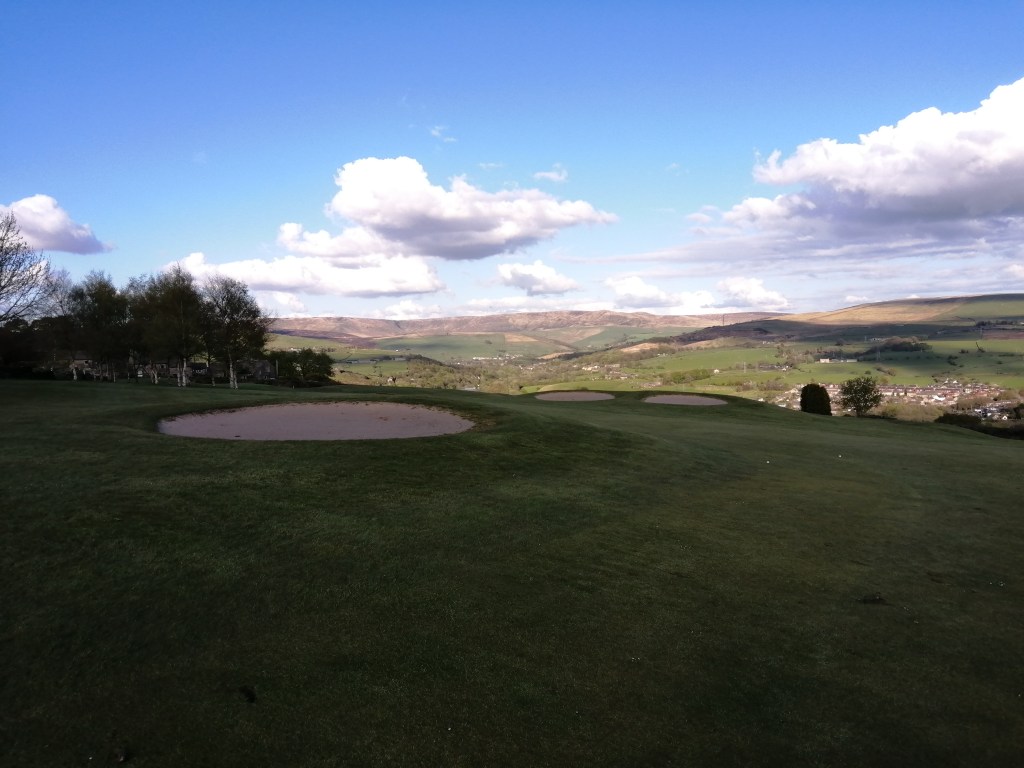
Hole 4 Jim Riddick
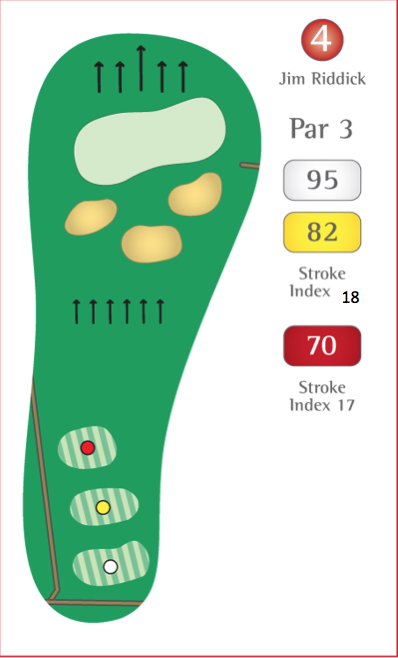
Don’t let the short distance fool you! This hole proves that you don’t have to make a par 3 over 200 yards to be difficult. The green, although very wide is short in depth, and is well protected in front by two bunkers. Whatever you do – don’t go long or you will be lucky to get up and down as the green drops steeply towards the front and you’ll be lucky to keep your ball on the green for a short putt! Similarly, drop your tee shot too short and you might catch the downslope behind the bunkers and your ball will shoot across the green and down the slope at the back!
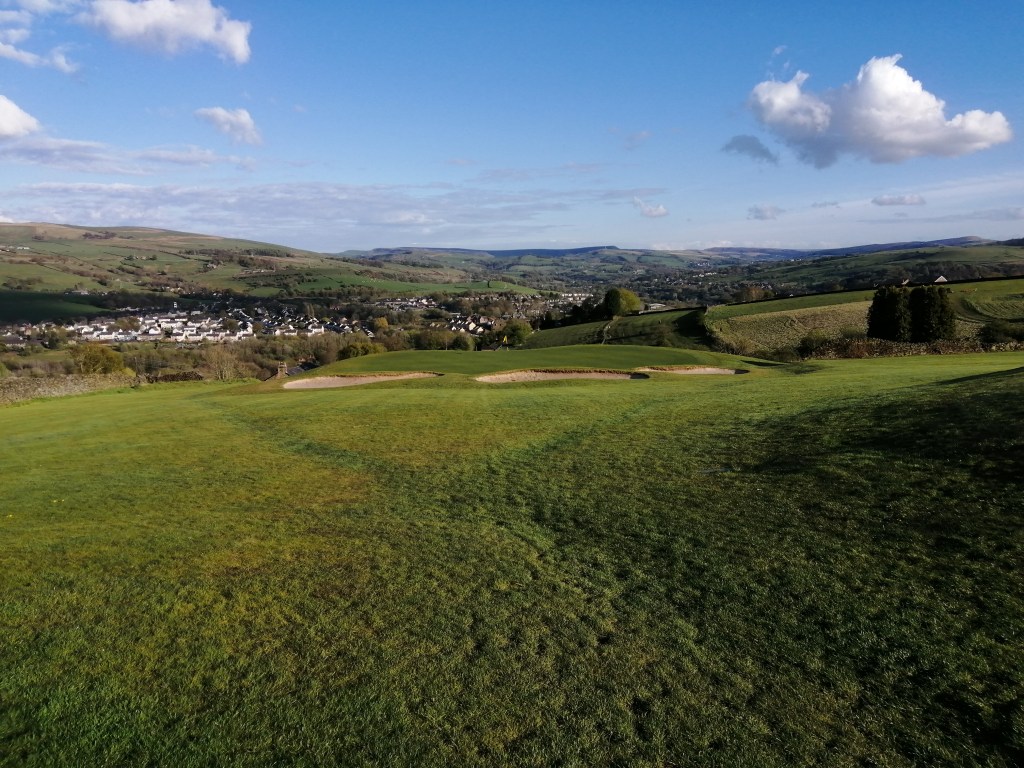
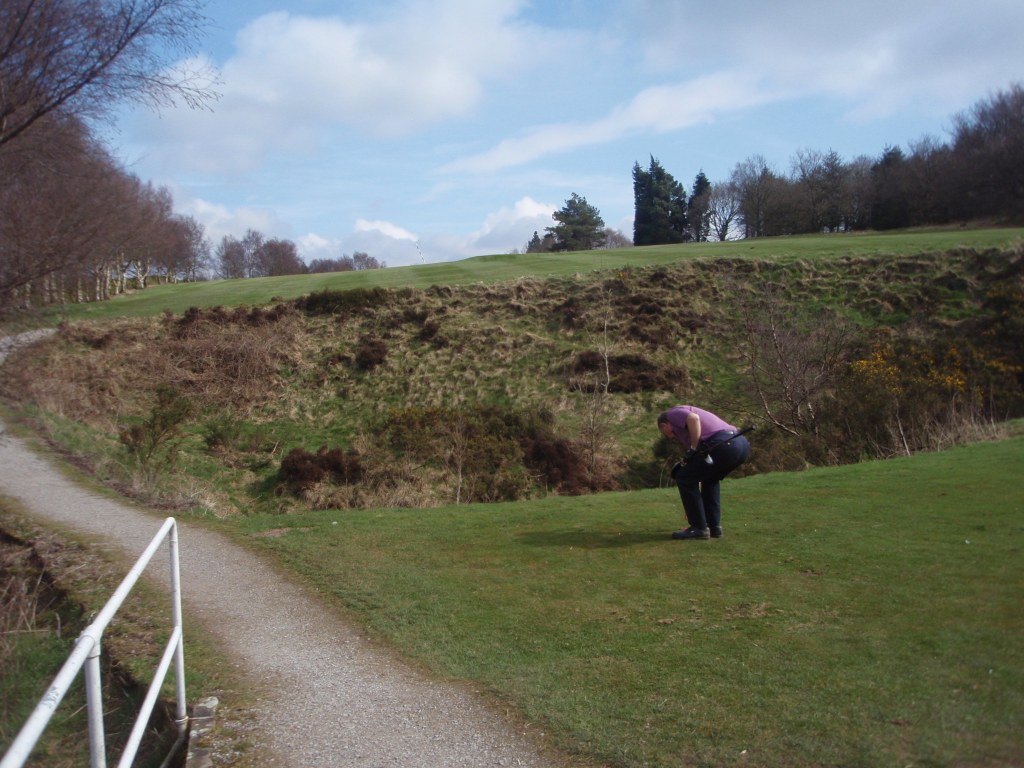
Hole 5 Appletree
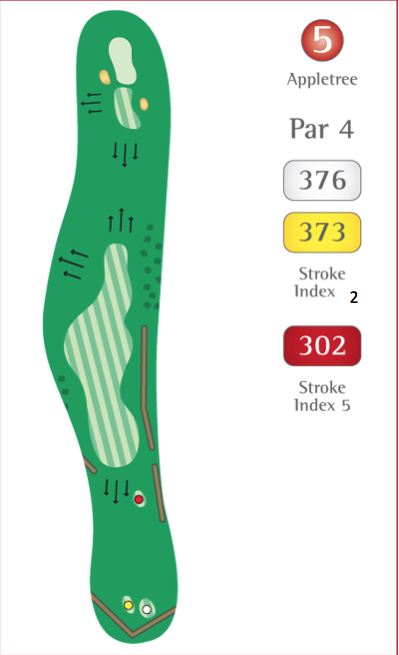
The tee shot is best hit as close to the marker pole as possible leaving a flat lie for the approach. Any tee shot hit past the marker post will run away to the left down the slope and into potential danger. The 2nd shot is not an easy one with the green being long and narrow and surrounded by sloping ground to the left and bunkers. Once on the green the work isn’t done. There are numerous breaks making some pins difficult to master.
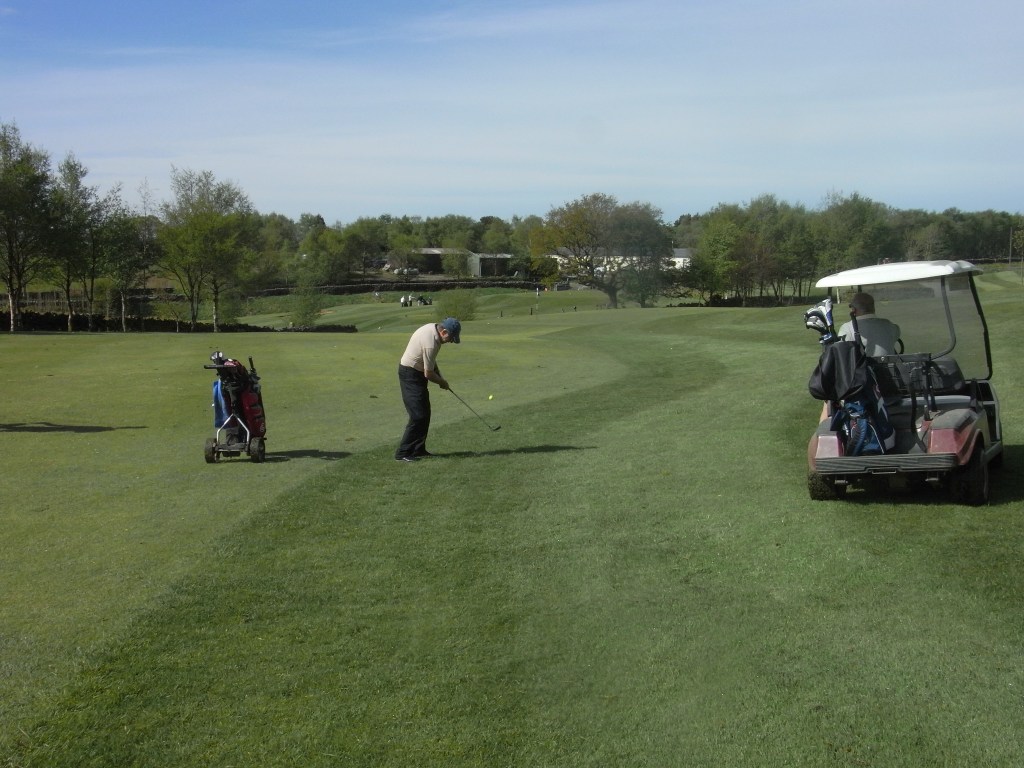
A new internal Out of Bounds (OOB) was introduced in May 2024. The main reason for this was to improve the safety of Golfers walking down the 3rd hole.
The following image indicates the position of the OOB area. This area will prevent big hitters blasting driver up the 3rd hole from the 5th hole. White posts are now on the course.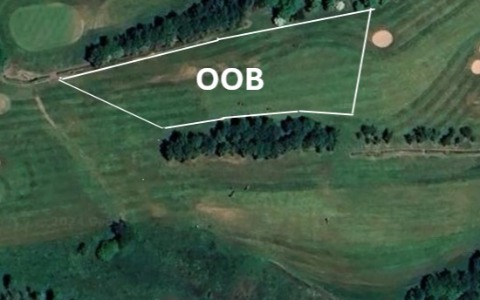 If your ball comes to rest in the OOB area at any point during the play of hole 5, you must take action of rule 18 below.
18.2b – What to Do When Ball Is Lost or Out of Bounds
If a ball is lost or out of bounds, the player must take stroke-and-dista
[Simple terms = If your ball is in the OOB area marked by the white posts you must play your shot again from the same location and add a 1 shot penalty]
PLEASE NOTE THE INTERNAL OOB ONLY APPLIES WHEN YOU ARE PLAYING HOLE 5.
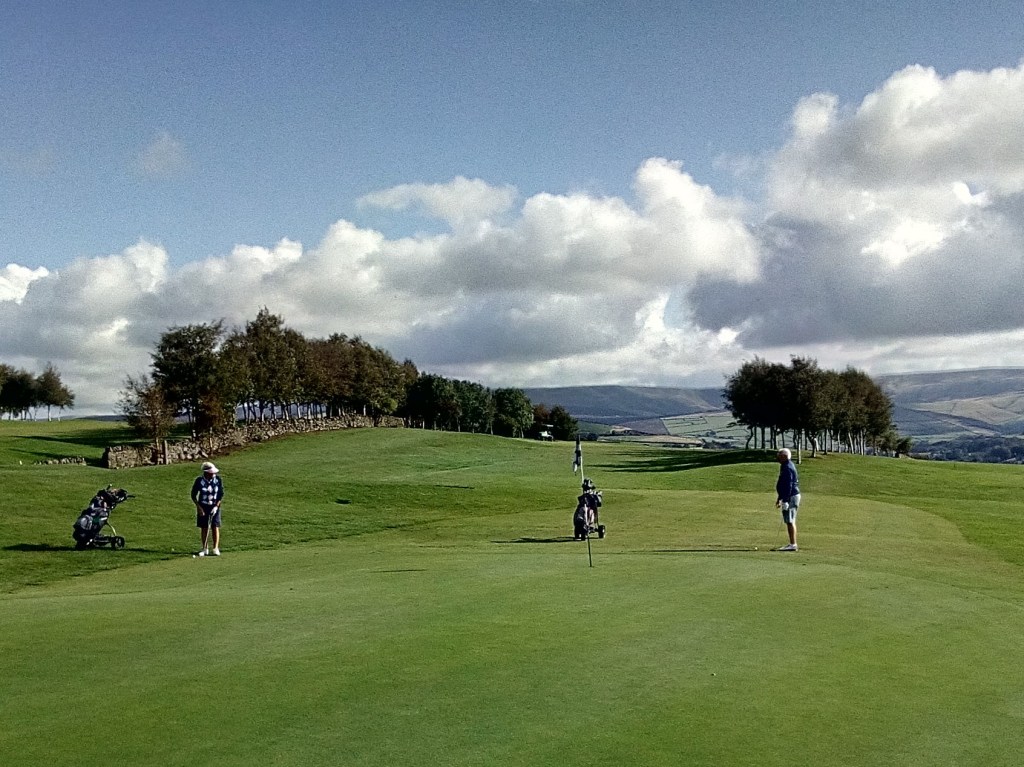
Hole 6 Stonypiece
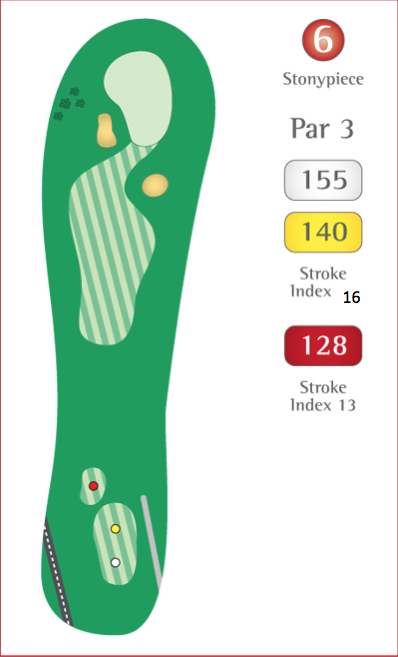
A nice par 3 with a kidney shaped green, being narrow at the front but a lot wider towards the back. Two bunkers guard the front of the green. However, a good tee shot here will give you a great birdie opportunity.
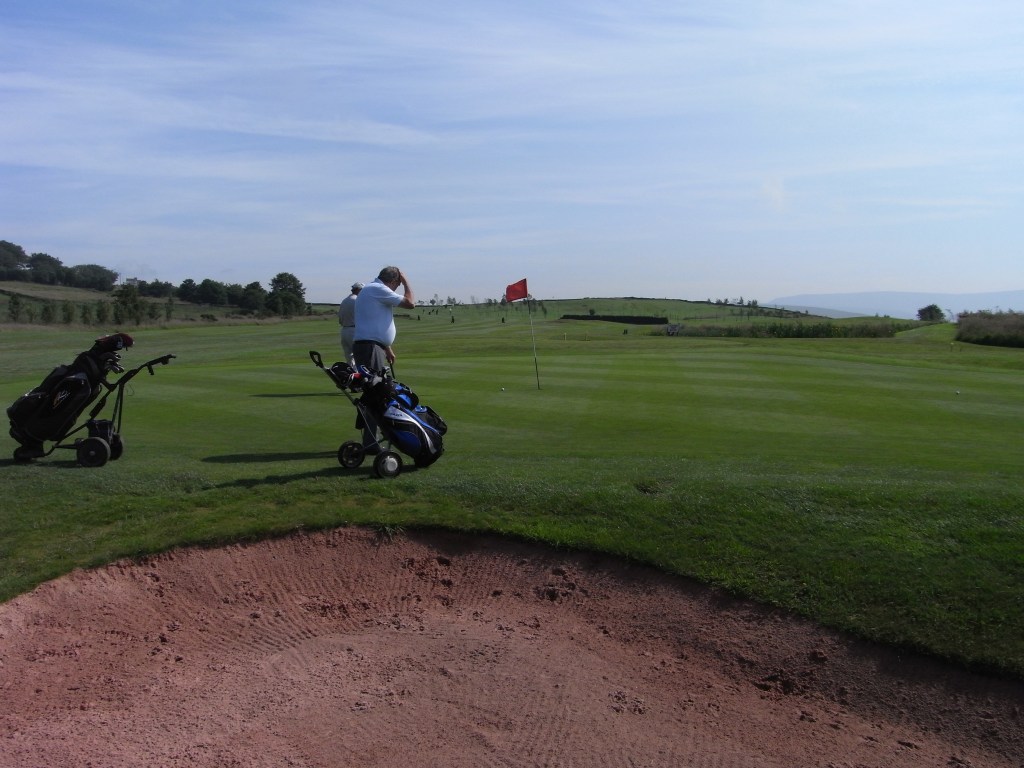
Hole 7 Redishaw
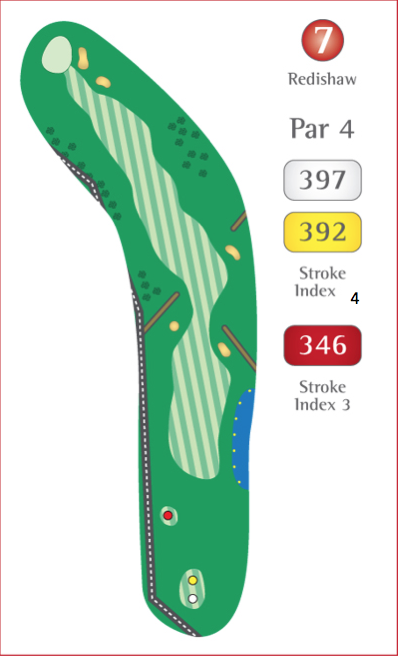

A nice dog-leg par 4 up to the top corner of the course. Another risk and reward tee shot for those players who can cut the corner from the tee, but beware the rough on the other side of the wall! The approach shot always plays a club or two longer due to the fairly large elevated green. Don’t bail out right as the right hand side is well protected by two perilous bunkers.
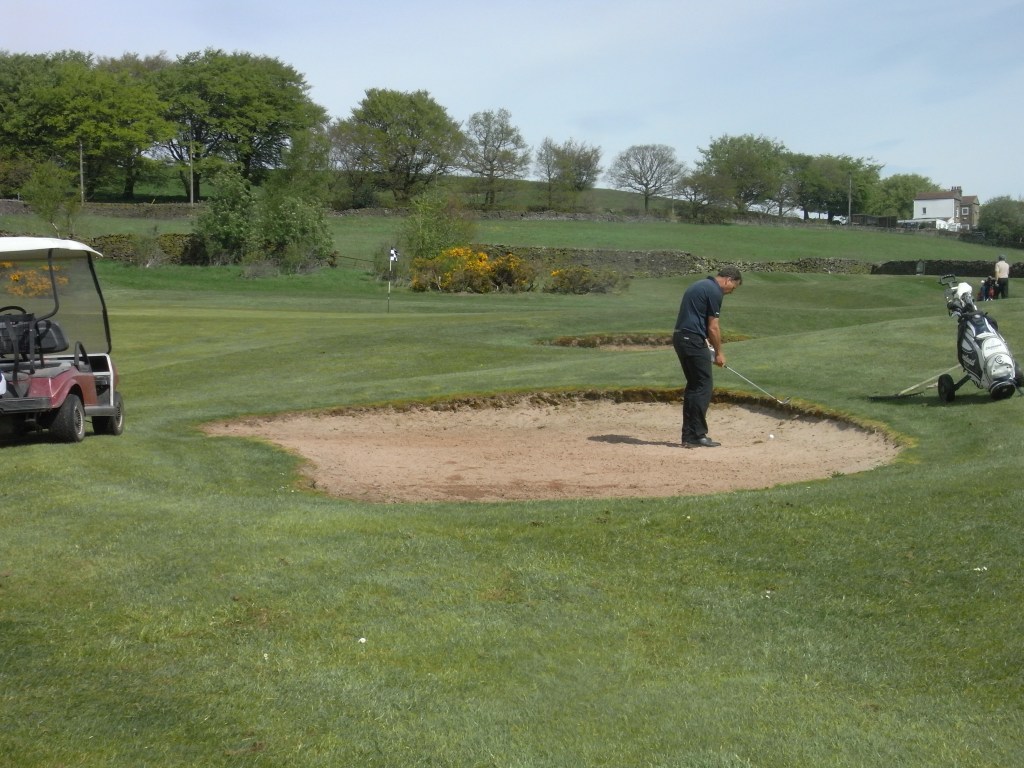
Hole 8 Castle Edge
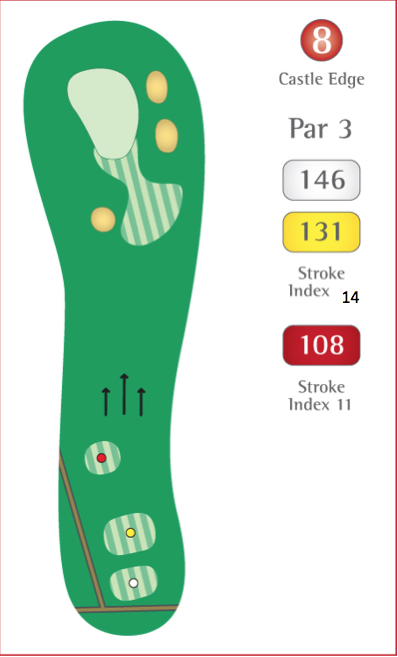
A picturesque par 3 across the top of the course with Kinder Downfall as a backdrop. A generous size green for a medium length par 3 but it is well guarded especially on the right by two bunkers which catch a ball landing on the green and running left to right.
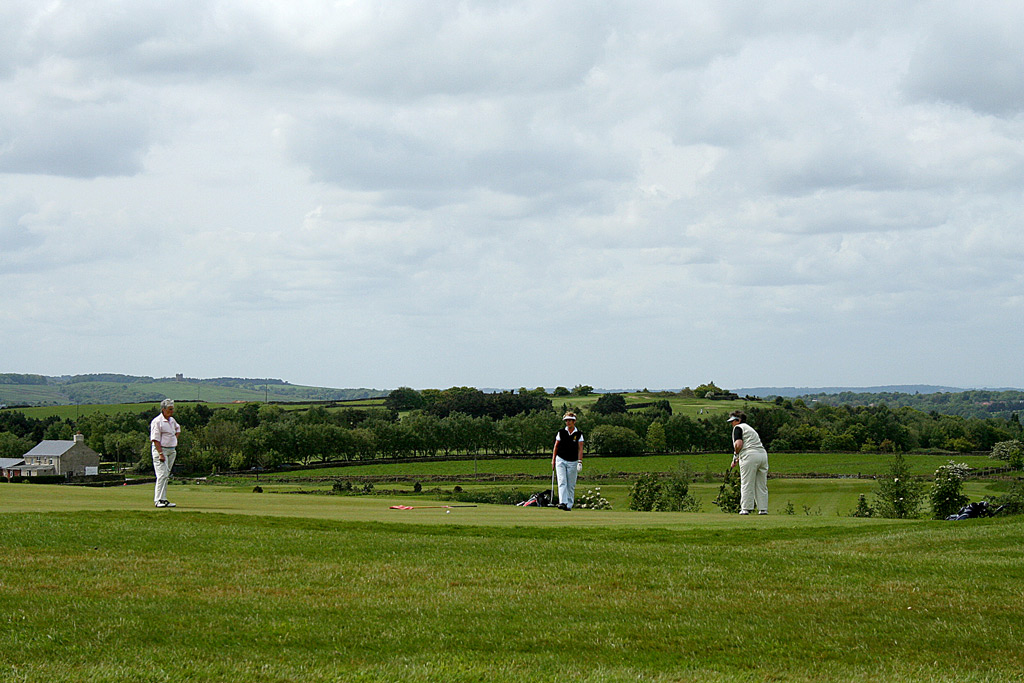
Hole 9 Shaw Marsh
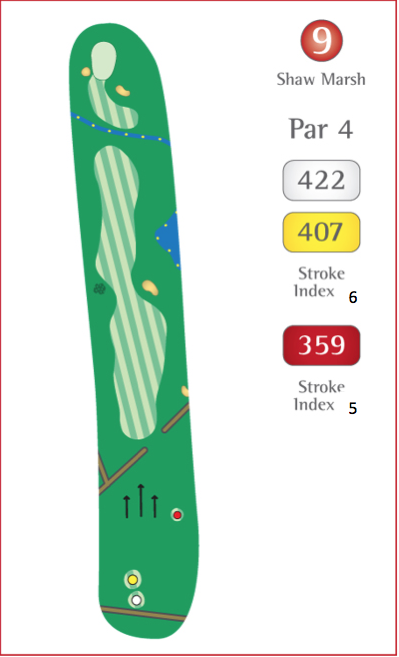

A potentially difficult par 4, if played into the prevailing wind. Hit a good tee shot avoiding the bunker on the right and then decide whether to attack the green with your approach, or to lay up because of the stream about 60 yards short of the green and the bunkers which guard the green on both sides.
Hole 10 The Road
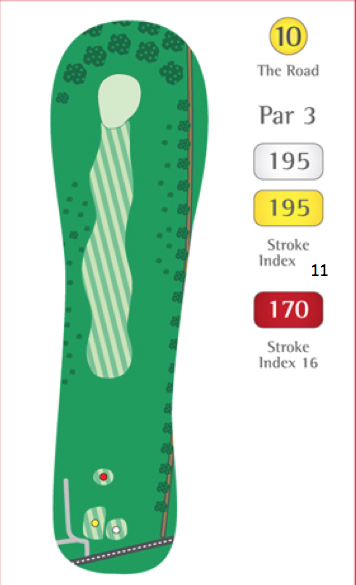
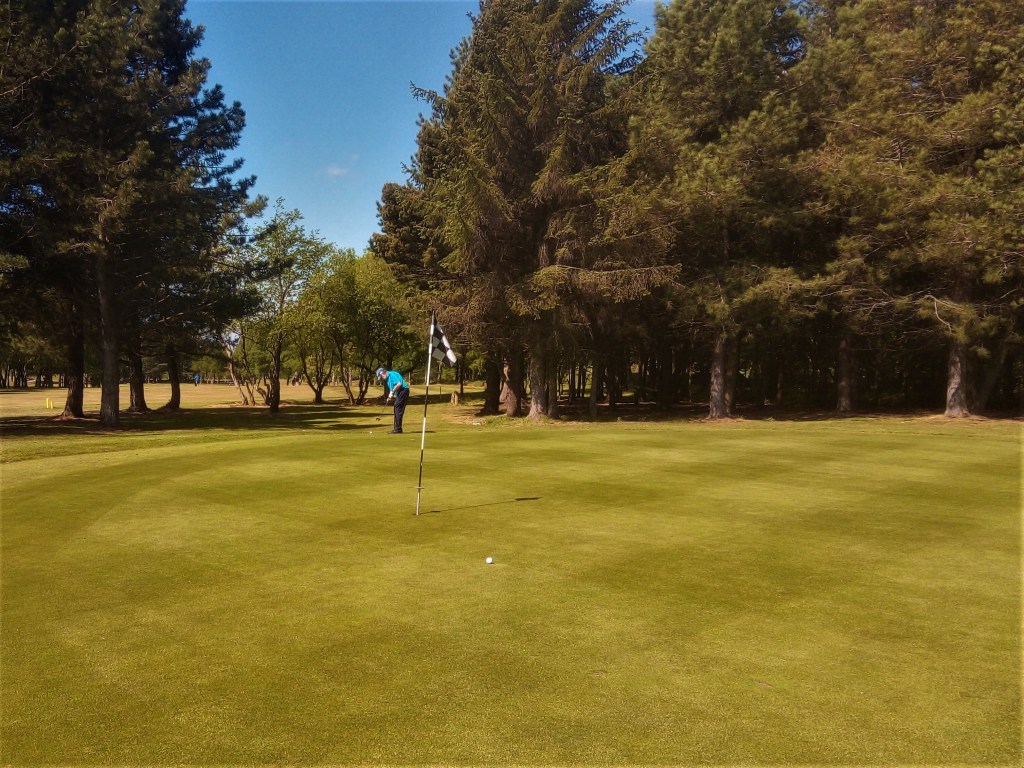
A long bunkerless par 3 which plays longer than it seems. Anything hit left will find the trees whilst a wayward slice can result in out of bounds. A tricky green runs away towards the trees behind.
Hole 11 Fred Jones
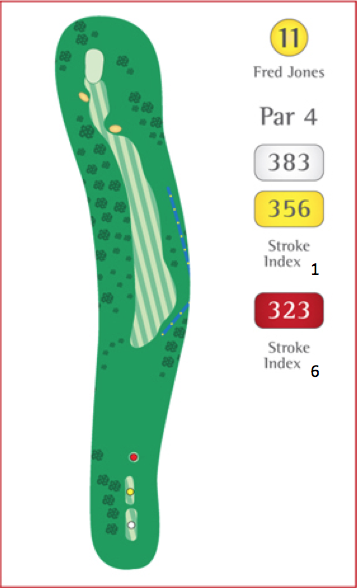
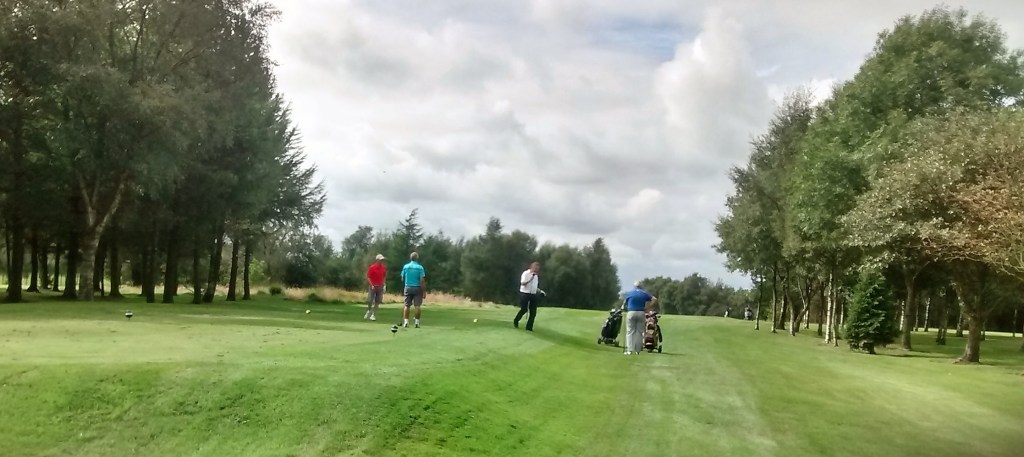
Easier off the yellow tees than the white, which can bring the trees on either side and the ditch on the right into play. A tee shot to the right of the fairway opens the green on this dog leg left hole . Underestimate your second shot and the bunker in front of the green will grab your ball.
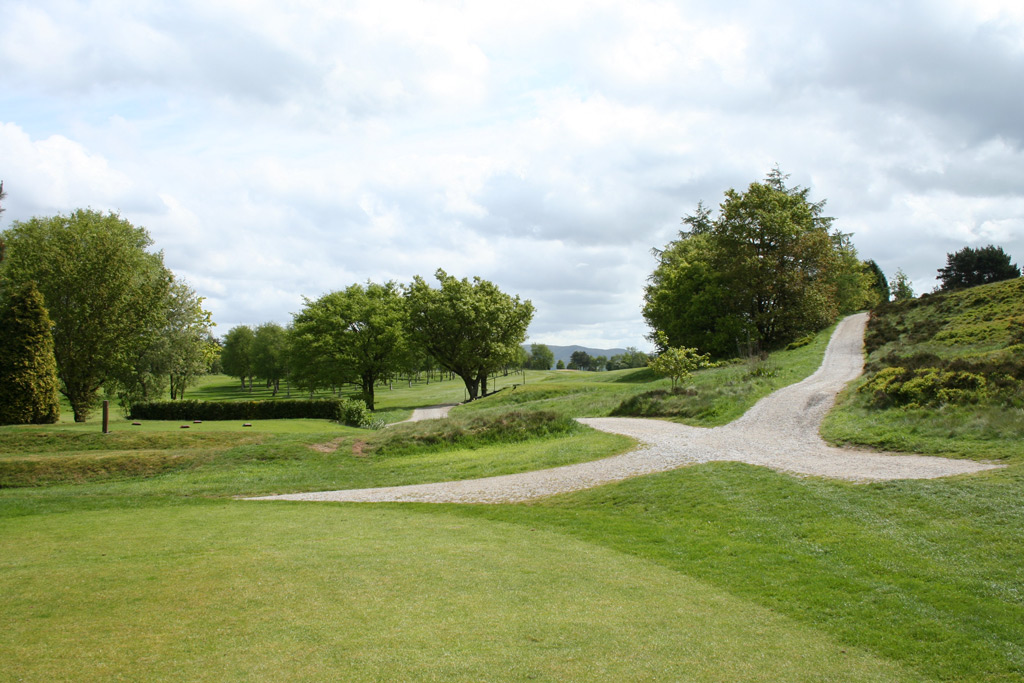
Hole 12 Quarry
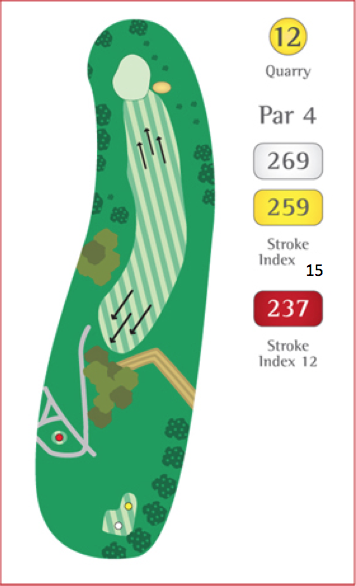
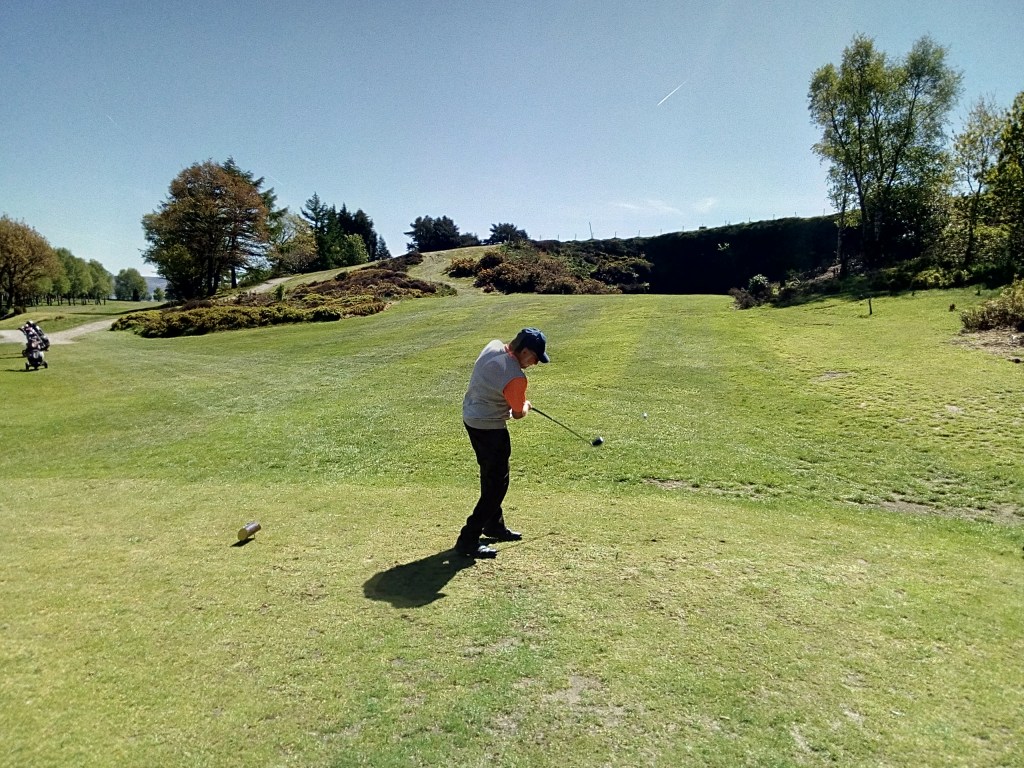
A blind tee shot over the quarry face is one of the most talked about and feared shots on the course. Club selection is important as your tee shot is often into the wind or wind assisted. Too far left and you may struggle to play your approach shot or even find your ball in the pit. Too far right and you may finish against the wall or beyond. Get this one wrong and your round could be ruined but get it right and a birdie or an eagle is there for the taking!
Hole 13 Kinder
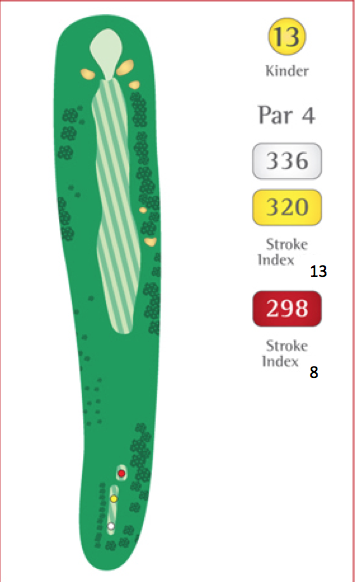
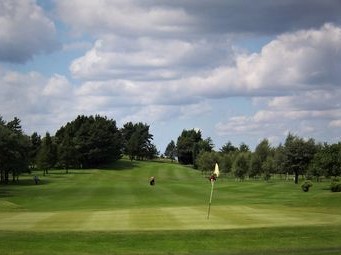
The tee shot on this par 4 is beautifully framed by trees on both sides. Another kidney shaped green, so looks tight from the front but there is plenty of space at the back. Bunkers in front of the green on both sides can ruin a potential par or birdie.
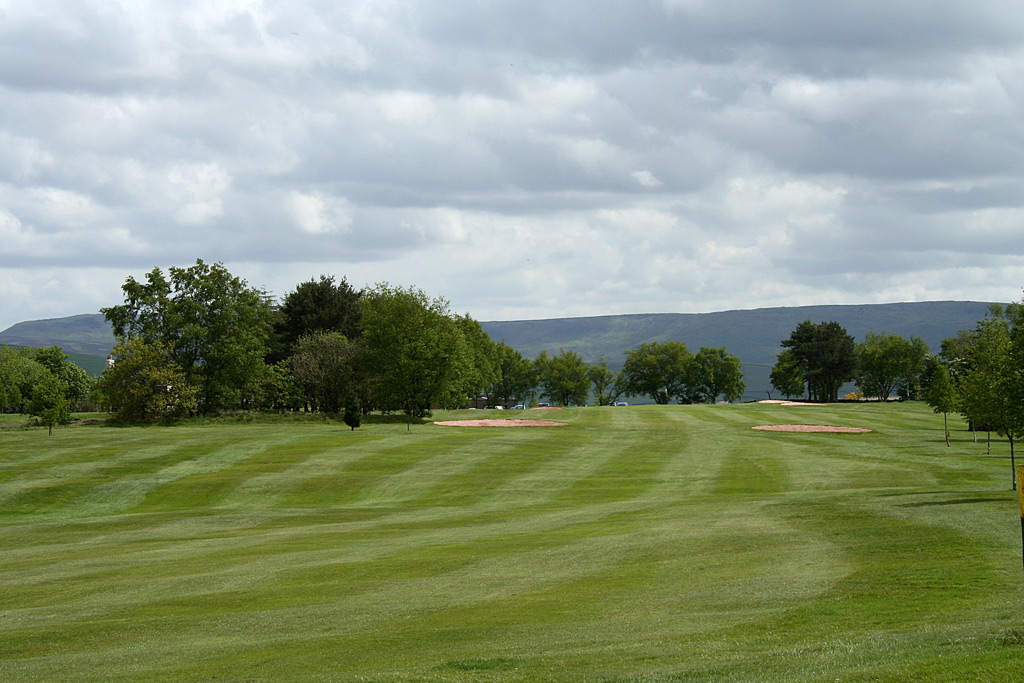
Hole 14 Knightwake
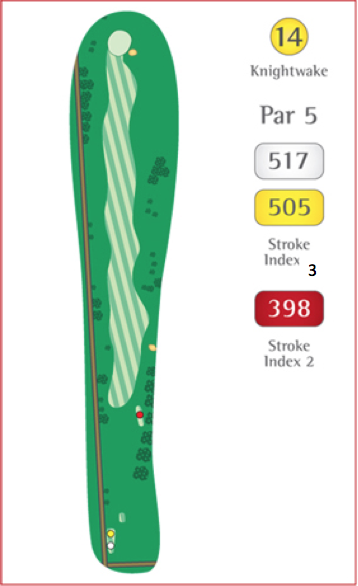
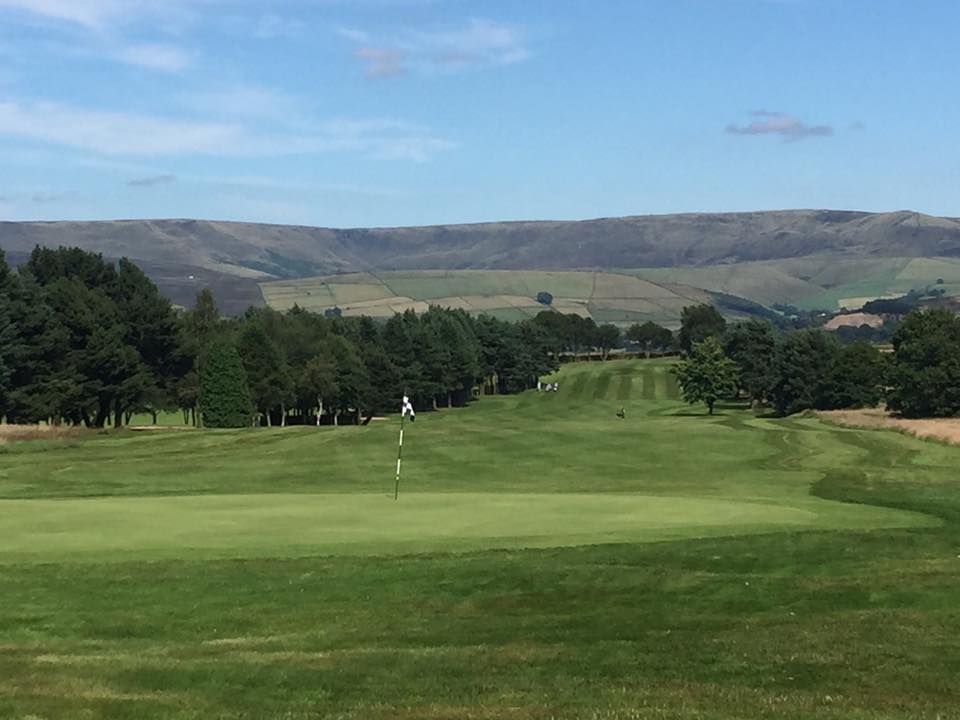 The longest, straightest hole on the course, played straight uphill. Not too many obstacles on the way other than the small green which slopes heavily from back to front and the bunkers on the right. Try to avoid a downhill putt!
Hole 15 Mashie
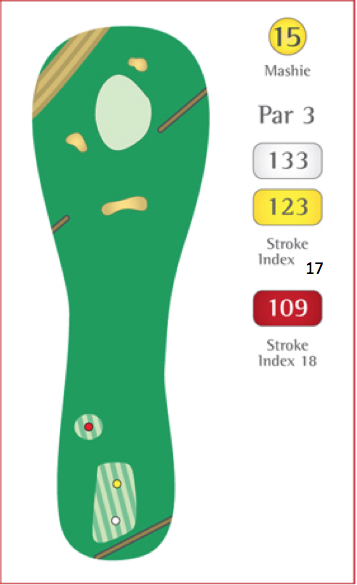
A short par 3 across the top of the back nine. Club selection is very important on this hole as the front bunker makes the hole look shorter than it plays, plus the direction of the wind can be a decisive factor in terms of club selection. Go too long and you could find yourself in the “quarry”. A generous sized green slopes from front to back.
Hole 16 Tater Field
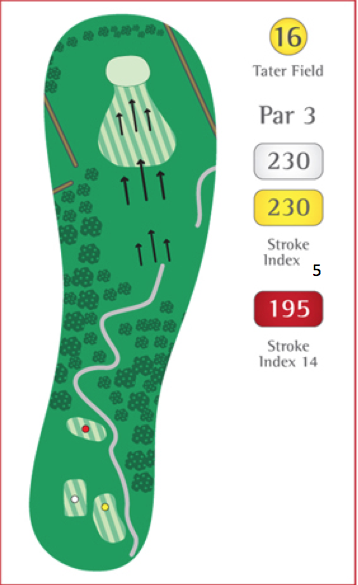
The most difficult and most spectacular par 3 on the course. With the tee being so elevated the ball seems to spend an eternity in the air, before facing its massive descent. Almost any club in the bag can be used on this hole depending on the wind. Catch the downslope and the ball will run towards the green but a wayward tee shot will be punished with out of bounds to the left and the right whilst under clubbing means you may never see your ball again!
Hole 17 Tommy’s Grave

A very tricky blind tee shot over Tommy’s Grave, so trust the marker pole for your line. Too far right and your approach may be blocked by trees. The approach to the green is guarded by a small water hazard short left and bunkers to the right.
Hole 18 Rigby’s

A tight tee shot from an enclosed area starts this final hole but the target area soon opens up. Go over the tree straight in front or to the gap to the right but beware too far right or too far left and you could be in trouble. The main danger with the second shot are the fairway bunkers which are around 150 yards short of the green and in a bottleneck, so decide whether to lay up or go for glory.